Before we dive into the world of homemade frozen French fries, let’s talk about what delicious creations can accompany this crispy delight. Imagine serving them with juicy burgers, sandwiches bursting with flavor, or a tangy dipping sauce like homemade ketchup or garlic aioli.
They also shine when perched alongside crispy fried fish or even a veggie-packed salad for that perfect crunch. When you serve fries, they draw the crowd to the table. Now, let’s peel back the layers and explore how to whip up your very own batch of frozen French fries.

You’ll Also Like These Recipes
You just got home after a long day at work. The fridge is looking a bit bare, but you have those russet potatoes waiting in the corner. You could order takeout, but there’s something much more satisfying about creating your own food magic from scratch.
That’s where homemade frozen French fries come into play. They’re simple to make, cheaper than store-bought, and they taste way better. Trust me—once you’ve made these, those soggy, pre-packaged fries will feel like a distant memory.
What Are Homemade Frozen French Fries?
Homemade frozen French fries are exactly what they sound like: fresh-cut potatoes that you prepare, freeze, and later bake or fry at your convenience.
They’re a staple for quick meals and snacks, offering that restaurant-quality crunch and flavor right from your own kitchen. You control the thickness, the flavor, and the cooking method. It’s freedom on a plate!
How Do They Taste?
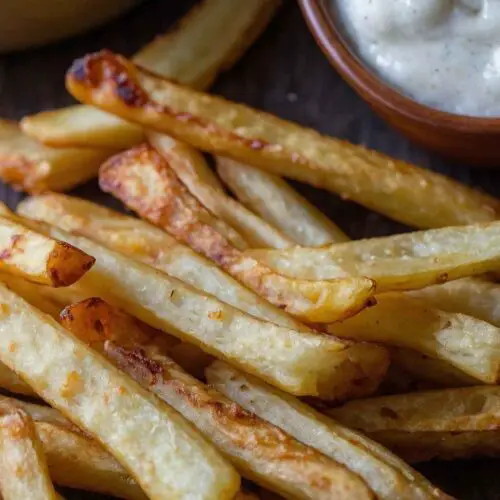
If you’ve ever bitten into a perfect French fry—golden, crispy outside, soft and fluffy within—you’ll know the joy they can bring. Homemade frozen fries don’t just match that expectation; they elevate it.
With controlled seasoning and the option to cook them just how you like, you can achieve fries that are sprinkled lightly with salt, infused with a hint of smoked paprika, or even dressed up with different herbs.
Why You’ll Love This?
Let’s break it down. Making your own frozen fries means no more worrying about preservatives or mystery ingredients. You’ll be using fresh potatoes and seasoning them however you like. Plus, they’re incredibly easy to prepare.
With just a few steps, you’ll have a big batch ready for the freezer. Whether you’re hosting a gathering or just enjoying a cozy night in, homemade frozen fries can fit right in.
Ingredients
To make your homemade frozen French fries, you’ll need:
- 1 teaspoon of smoked paprika
- 2 tablespoons of avocado oil (or olive oil)
- Freshly cracked black pepper to taste
- 4 medium-sized russet potatoes
- A pinch of sea salt

Step by Step Directions
Step 1: Prepare the Potatoes
Start by washing your russet potatoes thoroughly. Peel them if you want—this is completely up to you. Some folks swear by the skin for flavor and added nutrients, while others prefer a smooth fry.
Step 2: Cut the Potatoes
Next, slice your potatoes into even strips or wedges, depending on your preference. Aim for thickness similar to a pencil for the perfect crisp. The key here is uniformity; this ensures even cooking.
Step 3: Soak in Water
Soaking your potato strips in cold water for at least 30 minutes helps remove excess starch. This results in fries that are soft on the inside and perfectly crisp on the outside after cooking. It’s a game changer, trust me.
Step 4: Drain and Dry
Once your fries have soaked, drain the water and pat them dry thoroughly with a clean kitchen towel. Moisture is the enemy of crispiness, so take your time with this step.
Step 5: Season and Oil
In a large bowl, toss the dried potato strips with the avocado oil, smoked paprika, sea salt, and black pepper. Make sure all the fries are evenly coated.
Step 6: Pre-heat the Oven
Preheat your oven to 425°F (220°C). The higher temperature allows for a lovely outer layer that will leave you wanting more.
Step 7: Arrange on Baking Sheet
Spread the fries in a single layer on a baking sheet lined with parchment paper. Don’t overcrowd them; they need space to breathe to become perfectly crispy.
Step 8: Bake
Bake your fries for about 30 minutes, flipping them halfway through. This ensures they cook evenly and develop golden brown goodness on all sides. Keep an eye on them towards the end, as oven temperatures can vary.
Step 9: Cool and Freeze
Once your fries are baked to perfection, allow them to cool completely. Then, arrange them in a single layer on a baking sheet.
Freeze them for a couple of hours and then transfer them to an airtight container or freezer bag for longer storage.
Tips on Making Homemade Frozen French Fries
- Choose the Right Potatoes: Stick with high-starch varieties like russets for the best texture.
- Don’t Skip Soaking: This small step makes a significant difference in crispiness.
- Experiment with Seasonings: Try garlic powder, Parmesan cheese, or herbs for varied flavors.
- Batch Cooking: Make a large batch and freeze them to always have fries on hand.
- Double Frying: For extra crispiness, fry the frozen fries twice—once at 325°F and then at a higher temperature.
Nutrition Information
Homemade frozen french fries recipe nutrition facts

How Do You Store Homemade Frozen French Fries?
To store your homemade frozen fries, make sure they are completely cooled before placing them in an airtight container or freezer bag.
Squeeze out as much air as possible. They can last up to three months in the freezer. When you’re ready to use them, simply bake or fry from frozen.

What Other Substitutes Can You Use in Homemade Frozen French Fries?
- Sweet Potatoes: They offer a sweeter flavor and are rich in vitamins.
- Zucchini: For a low-carb alternative, zucchini fries can be a delightful twist. Just cut them thicker and be mindful of moisture.
- Parsnips: These can create a unique flavor profile and are a great way to diversify your fry experience.
- Butternut Squash: Cut into fry shapes, these will add color and a touch of sweetness to your meal.
- Carrots: Thinly sliced and roasted will yield a crunchy alternative that kids will love.
Homemade Frozen French Fries Recipe
Equipment
- large bow
Ingredients
- 1 teaspoon of smoked paprika
- 2 tablespoons of avocado oil or olive oil
- Freshly cracked black pepper to taste
- 4 medium-sized russet potatoes
- A pinch of sea salt
Instructions
Step 1: Prepare the Potatoes
- Start by washing your russet potatoes thoroughly. Peel them if you want—this is completely up to you. Some folks swear by the skin for flavor and added nutrients, while others prefer a smooth fry.
Step 2: Cut the Potatoes
- Next, slice your potatoes into even strips or wedges, depending on your preference. Aim for thickness similar to a pencil for the perfect crisp. The key here is uniformity; this ensures even cooking.
Step 3: Soak in Water
- Soaking your potato strips in cold water for at least 30 minutes helps remove excess starch. This results in fries that are soft on the inside and perfectly crisp on the outside after cooking. It’s a game changer, trust me.
Step 4: Drain and Dry
- Once your fries have soaked, drain the water and pat them dry thoroughly with a clean kitchen towel. Moisture is the enemy of crispiness, so take your time with this step.
Step 5: Season and Oil
- In a large bowl, toss the dried potato strips with the avocado oil, smoked paprika, sea salt, and black pepper. Make sure all the fries are evenly coated.
Step 6: Pre-heat the Oven
- Preheat your oven to 425°F (220°C). The higher temperature allows for a lovely outer layer that will leave you wanting more.
Step 7: Arrange on Baking Sheet
- Spread the fries in a single layer on a baking sheet lined with parchment paper. Don’t overcrowd them; they need space to breathe to become perfectly crispy.
Step 8: Bake
- Bake your fries for about 30 minutes, flipping them halfway through. This ensures they cook evenly and develop golden brown goodness on all sides. Keep an eye on them towards the end, as oven temperatures can vary.
Step 9: Cool and Freeze
- Once your fries are baked to perfection, allow them to cool completely. Then, arrange them in a single layer on a baking sheet.
- Freeze them for a couple of hours and then transfer them to an airtight container or freezer bag for longer storage.
Notes
- Choose the Right Potatoes: Stick with high-starch varieties like russets for the best texture.
- Don’t Skip Soaking: This small step makes a significant difference in crispiness.
- Experiment with Seasonings: Try garlic powder, Parmesan cheese, or herbs for varied flavors.
- Batch Cooking: Make a large batch and freeze them to always have fries on hand.
- Double Frying: For extra crispiness, fry the frozen fries twice—once at 325°F and then at a higher temperature.
Nutrition
Frequently Asked Questions
1. Can I use other types of potatoes?
Absolutely! While russet potatoes are ideal, Yukon Gold or even red potatoes can work well. Just keep in mind that results may vary slightly.
2. Can I fry my fries instead of baking them?
Yes, you can! If you choose to fry, heat oil in a deep fryer or heavy pot and cook until golden brown. Make sure to drain on paper towels to remove excess oil.
3. How long does it take to cook frozen fries?
Generally, if cooking them from frozen, you can expect it to take about 20-25 minutes in a preheated oven at 425°F.
4. Can I season my fries before freezing them?
It’s best to season them just before cooking. Seasoning can lose potency during freezing and might not provide the best flavor.
5. Is there a way to avoid soggy fries later?
Properly drying the potatoes after soaking is key. Ensure they’re fully cooled before freezing and spread them in a single layer.
6. Can I use an air fryer for these fries?
Yes, an air fryer is a fantastic option! Just toss the frozen fries in the air fryer at about 400°F for about 15-20 minutes for a crispy result.
Conclusion
Making homemade frozen French fries is an adventure filled with flavor and satisfaction. With just a handful of ingredients, you can create a delicious snack or side dish that rivals anything you’d find in a restaurant.
The steps are straightforward, and with a little prep, you’ll have a stock of irresistible fries ready for any meal.
So, grab those russet potatoes, roll up your sleeves, and let the fry-making fun begin. Your taste buds will thank you, and you’ll wonder why you ever settled for store-bought again. Enjoy every crispy bite!